
Why Understanding Your Horse’s Lower Leg Matters
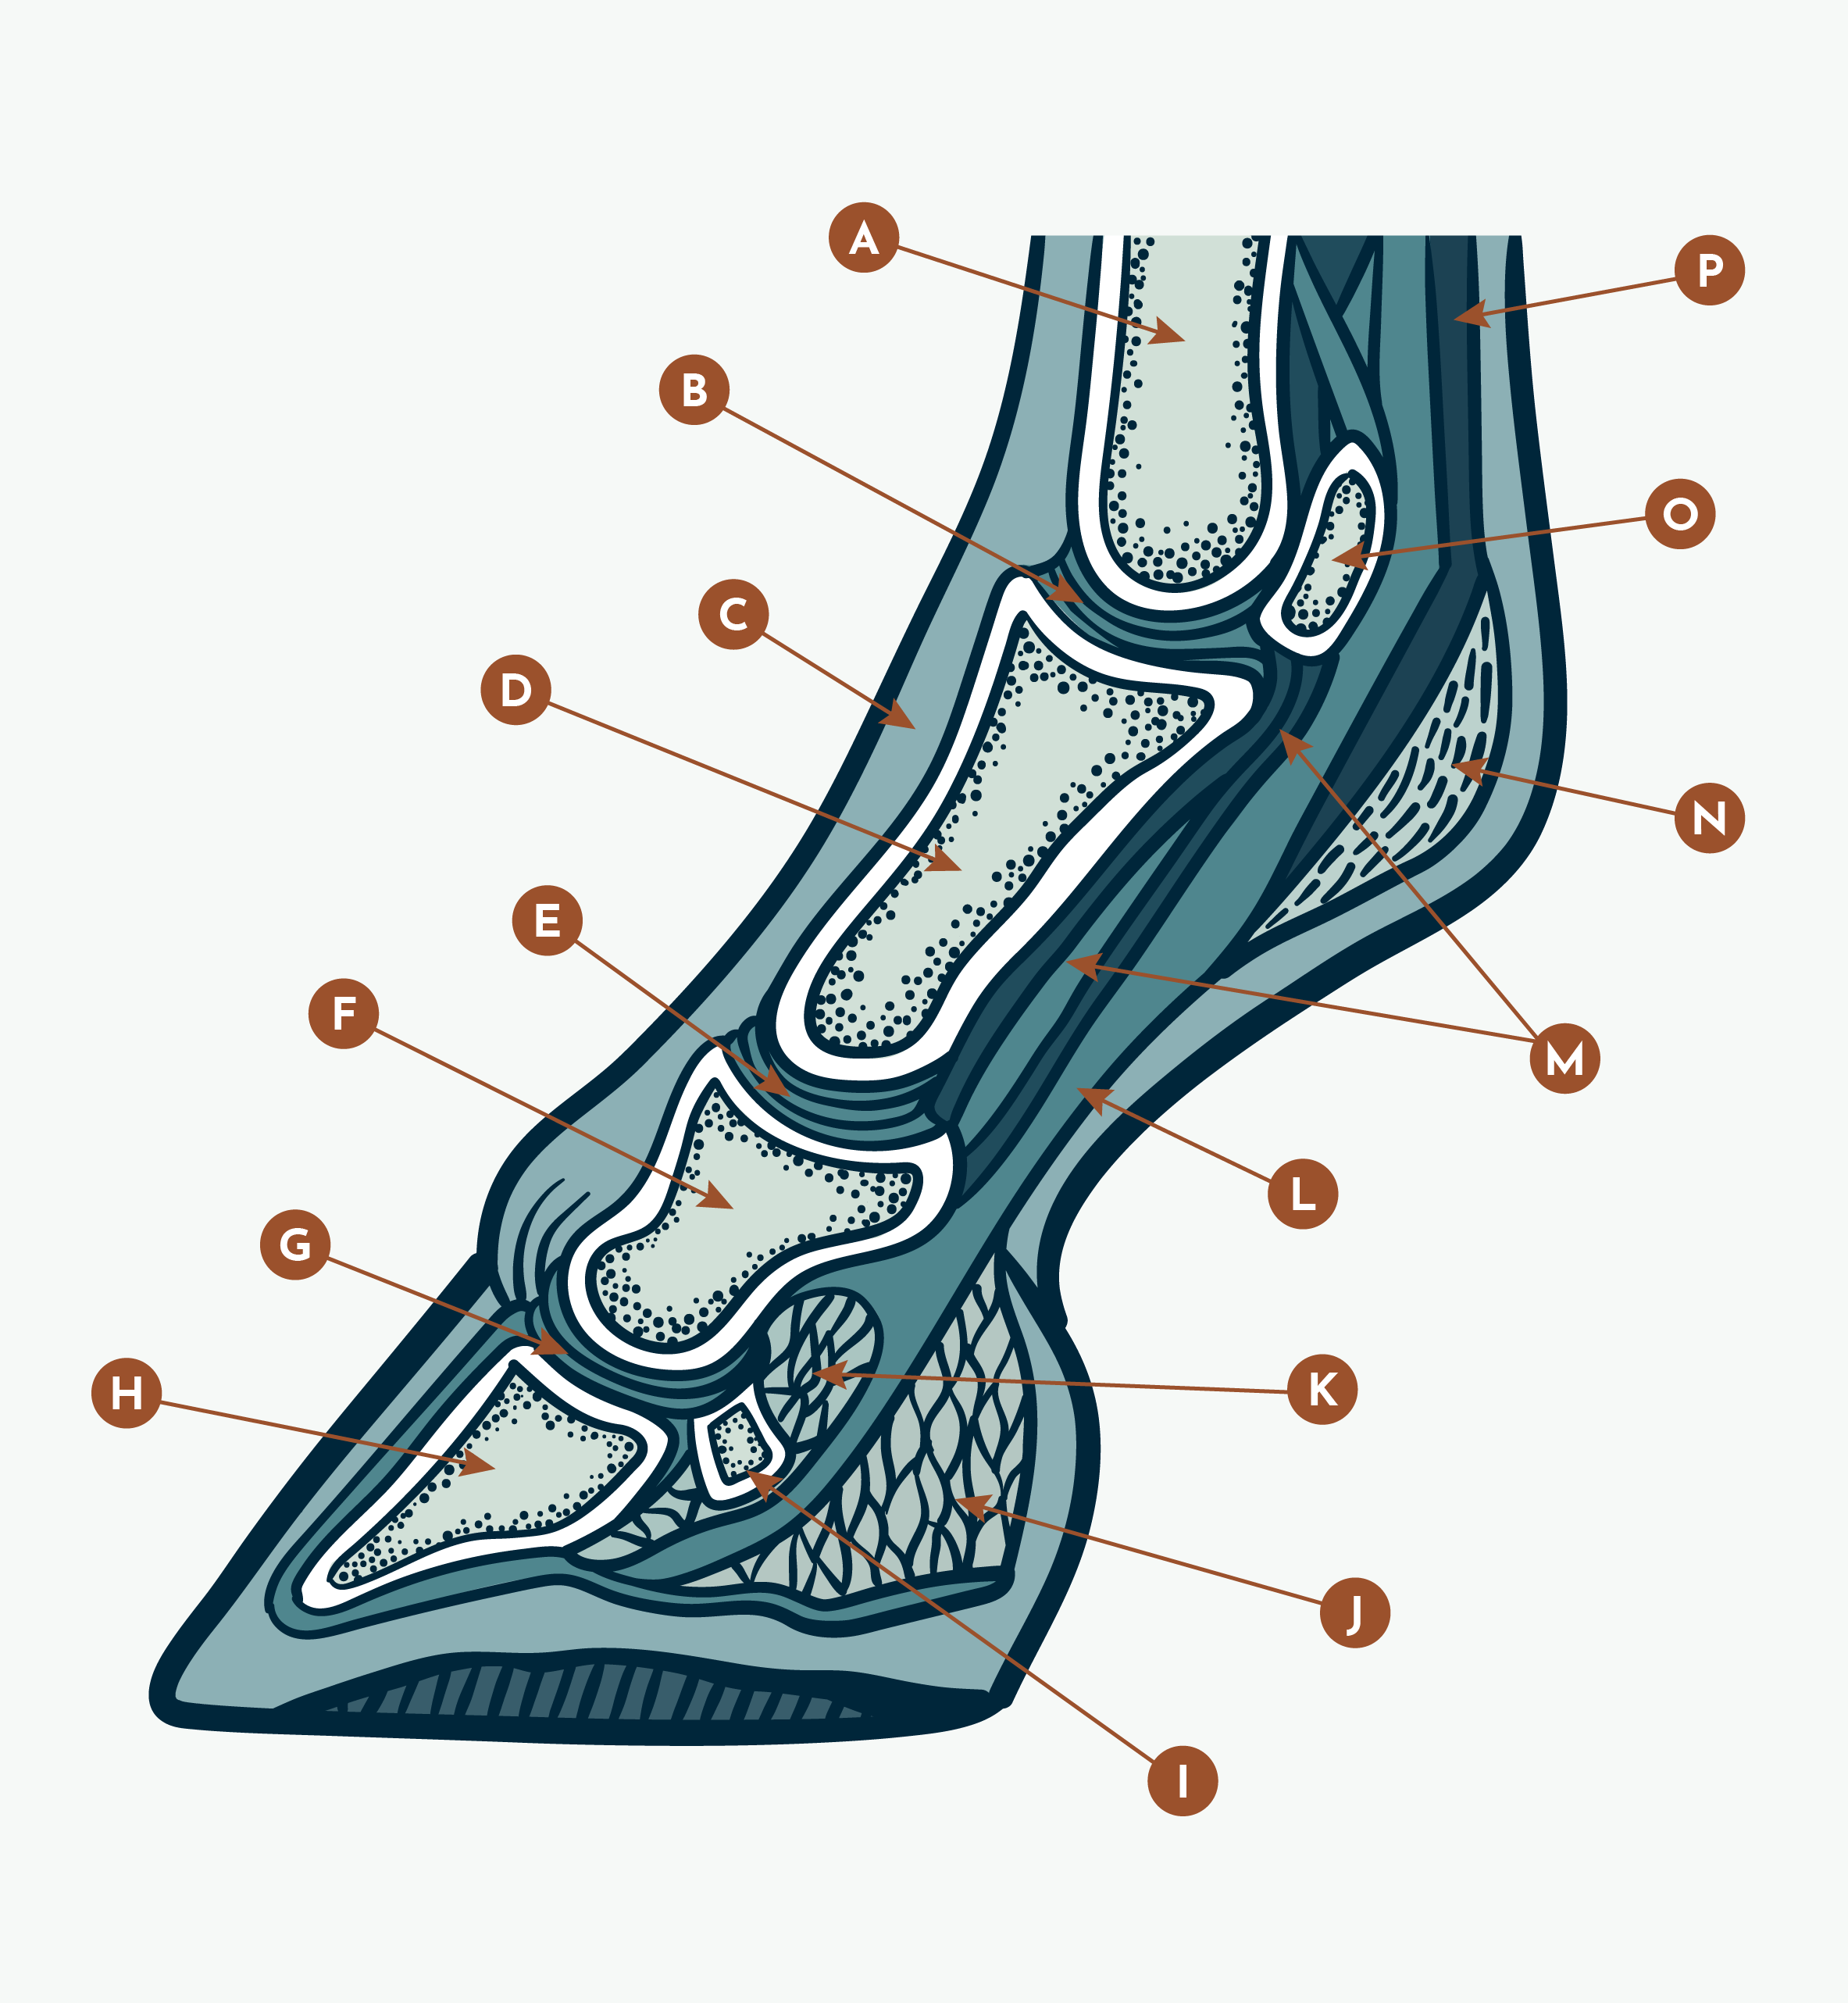
Explore Your Horse’s Lower Leg Anatomy
The lower leg plays a critical role in every stride, jump, and stop your horse makes. Knowing the anatomy can help you recognize early signs of strain, support recovery, and make informed decisions about therapy and care.
-
The large central bone in the horse’s lower leg, critical for weight-bearing and shock absorption.
Injury Risk: Prone to stress fractures and bruising under heavy training loads or hard surfaces. -
The joint where the cannon bone, long pastern, and sesamoid bones meet, allowing flexion and extension during movement.
Injury Risk: Common site for inflammation (fetlock arthritis) and soft tissue injury from overuse or trauma. -
Runs down the front of the leg, extending the digit during movement.
Injury Risk: Less commonly injured, but can suffer strain from overextension or awkward landings. -
Connects the fetlock to the pastern joint, transmitting force down the leg.
Injury Risk: Susceptible to fractures or inflammation, particularly in jumping or high-impact activities. -
The low-motion joint between the long and short pastern bones.
Injury Risk: Can develop arthritis or joint effusion in older or heavily worked horses. -
A small bone between the pastern and coffin joints, helping with load transfer.
Injury Risk: Vulnerable to fracture and degenerative joint disease with repetitive stress. -
Deep within the hoof, it connects the short pastern, coffin bone, and navicular bone.
Injury Risk: A common site for arthritis and inflammation, especially in performance horses. -
Encased within the hoof, it provides structure and weight support.
Injury Risk: Can be affected by laminitis, fractures, or chronic hoof imbalance. -
Stabilize the navicular bone and support the coffin joint.
Injury Risk: Involved in navicular syndrome, a leading cause of chronic forelimb lameness. -
A small bone behind the coffin joint, key to smooth movement within the hoof.
Injury Risk: Central to navicular disease, leading to pain and reduced performance. -
A shock-absorbing structure within the heel, helping dissipate impact forces.
Injury Risk: Can deteriorate with poor hoof health or lack of movement, affecting soundness. -
A major tendon that flexes the hoof and supports the lower limb.
Injury Risk: High-risk for strain, tears, or tendonitis, especially in hard-working horses. -
Support the sesamoid bones and prevent overextension of the fetlock.
Injury Risk: Commonly injured in performance horses, leading to fetlock instability. -
A small, callous-like structure on the back of the fetlock, remnant of a toe from earlier evolution.
Injury Risk: Not typically associated with injury; may get irritated by boots or wraps. -
Two small bones at the back of the fetlock that act as pulleys for flexor tendons.
Injury Risk: Can fracture or become inflamed (sesamoiditis) with high-impact work. -
A key tendon that flexes the pastern and fetlock, running down the back of the leg.
Injury Risk: Highly susceptible to strains, tears, and bowed tendons in active horses.
Bringing portable hydrotherapy across the Fraser Valley
Phone
(555) 555-5555